On React Suspense’s throttling
Table of Contents
Introduction
I have to admit, the title sounds a bit ambiguous. But, the idea of this article came to mind after I have stumbled across a very interesting test case for the React’s Suspense component. I thought it was something definitely worth sharing.
Throttling can be taken into account when we consider nested Suspense components. What is actually meant by throttling is delaying showing the fallback component of a nested Suspense component immediately after its parent Suspense component has stopped suspending. This will make more sense by the end of this article.
We will first cover some basics of the Suspense component, then we will move to the interesting bits of this article.
For the record, the test case this article is based on is called does not throttle fallback committing for too long.
Let’s get started!
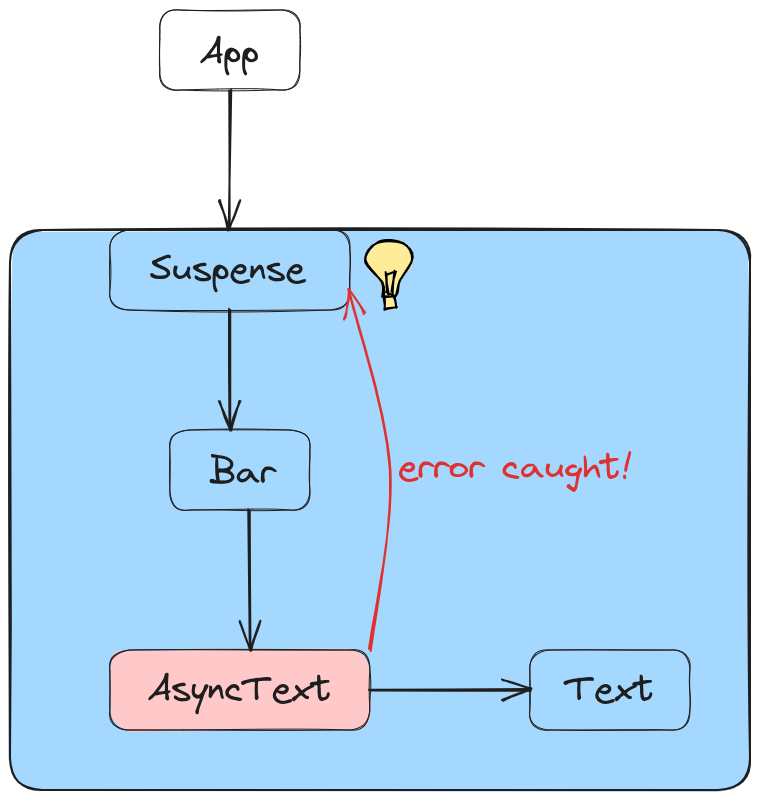
Why do Suspended components throw errors?
There answer is that Suspense mimics the behavior of error boundaries.
In order to understand how the Suspense component works, we will essentially have to understand how error boundaries work. So, surprisingly, we will solve two problems at once, which doesn’t sound quite bad.
In the next section, we will quickly touch on the fundamentals of the Suspense component.
A basic example of a Suspense component
This is the example we’re going to use throughout this section:
function Bar(props) {
  return props.children;
}

function AsyncText({text}) {
    // `readText()` will trigger the `<Suspense />` component.
		readText(text);
		return text;
}

function Text({text}) {
    return text;
}

// ==================================

function App () {
	<Suspense fallback={<Text text="Loading..." />}>
		<Bar>
      <AsyncText text="A" />
      <Text text="B" />
    </Bar>
	</Suspense>
}
The above example is heavily inspired by React’s Suspense test suite.
In the snippet above, AsyncText will be responsible for fetching data and, as a result, for making the Suspense component show the fallback component declared as a prop. For the purpose of simplicity, we are not going to focus on <AsyncText />’s readText() function - it suffices to know that the function will throw a promise the first time it is invoked and, while the data is fetched(i.e. during the pending state), the Suspense’s fallback component will be shown. When the data has arrived, React will know when to stop showing the fallback component and render the subtree whose root is the <Bar /> component.
The component hierarchy can be visualized this way:
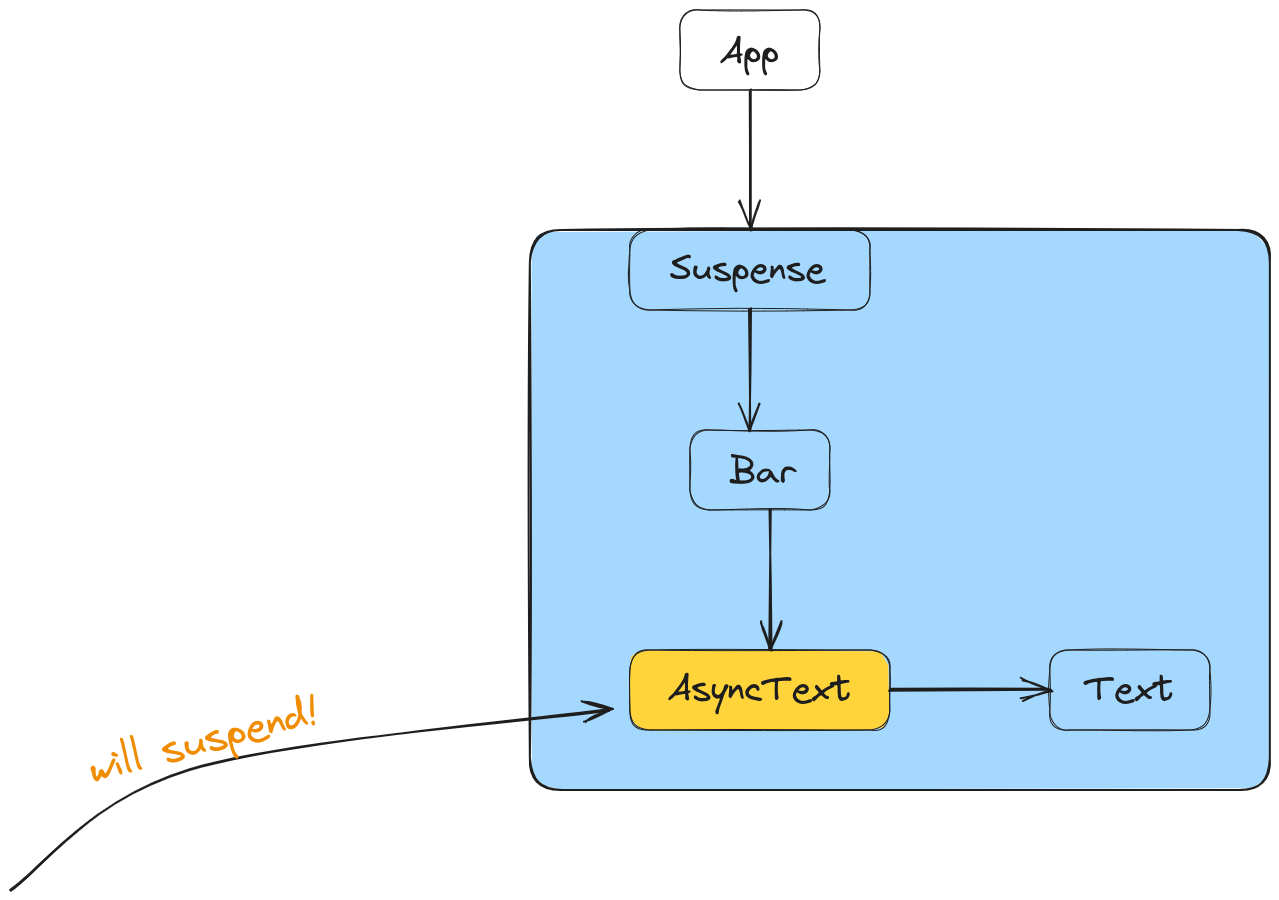
The
AsyncTextandTextcomponents are placed this way(on the same row and only one arrow connecting them) because this resembles the actual way React structures Virtual DOM nodes. In this case, they are sibling components. More about the React’s Virtual DOM implementation can be found here.
Notice how we have delimited the Suspense’s subtree in blue.
Now, on the first render, when the AsyncText component will be rendered, the readText() function will inevitably be invoked. When that happens, that function will throw a promise. What happens next is that React will temporarily stop the rendering process because it has to find the closest Suspense component relative to the AsyncText component. In this case, it’s obvious which Suspense component will be chosen:
At this point, once the closest Suspense component has been found, that component must render the provided fallback component and basically suspend its content.
In the next section, we will see how React handles nested Suspense components.
Nested Suspense components
Our example for this section looks like this:
function AsyncText({text}) {
    // `readText()` will trigger the `<Suspense />` component.
		readText(text);
		return text;
}

function Text({text}) {
    return text;
}

// ================================

function App() {
	return (
	  <Suspense fallback={<Text text="Loading..." />}>
	    <AsyncText text="A" />
	    <Suspense fallback={<Text text="Loading more..." />}>
	      <AsyncText text="B" />
	    </Suspense>
	  </Suspense>
	);
}
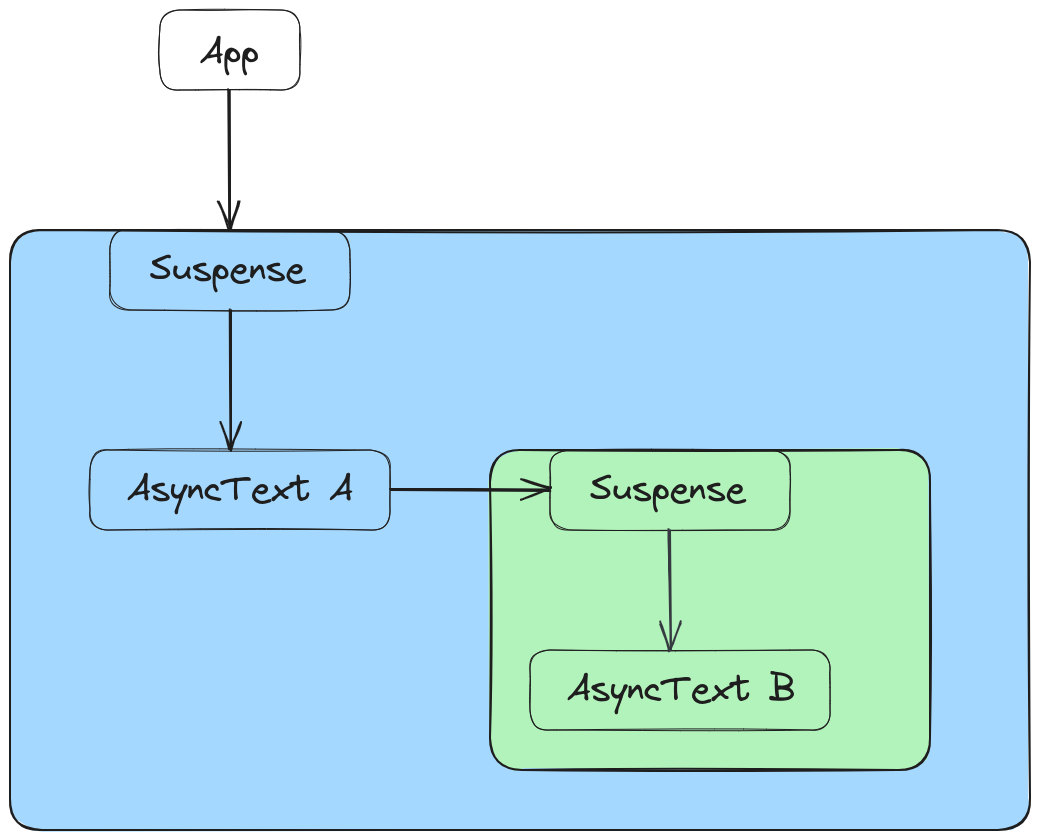
And here is the corresponding diagram:
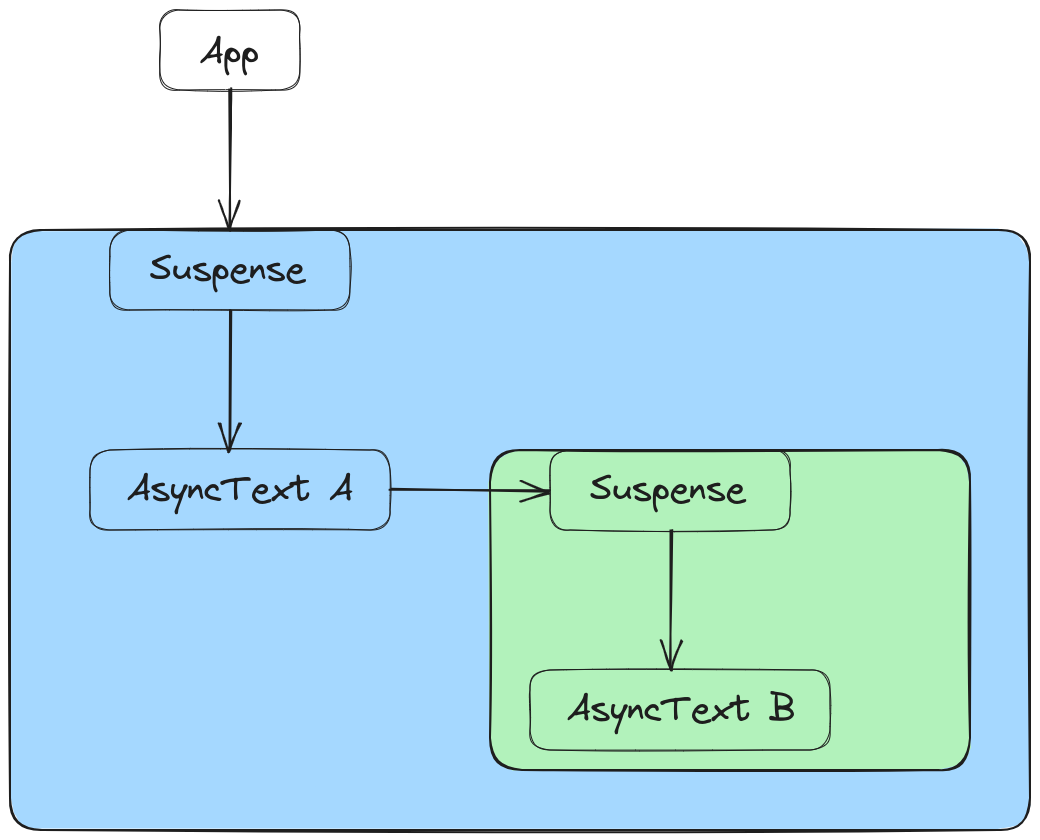
The above example is heavily inspired by React’s
<Suspense />test suite.
Notice how the two Suspense subtrees are colored in blue and green, respectively.
Before going any further, there is an interesting question I’d like you to ponder a bit: which Suspense subtree will suspend first? The blue one or the green one?*
Firstly, we can all agree that the App component will render first. Then, its single Suspense child will render. Then, since the the AsyncText A component will have to render first(because it’s the first child), its rendering will cause a promise to thrown(due to the readText() function) and, as a result, the blue Suspense will suspend first. The green one won’t even be reached because the fallback will be shown:
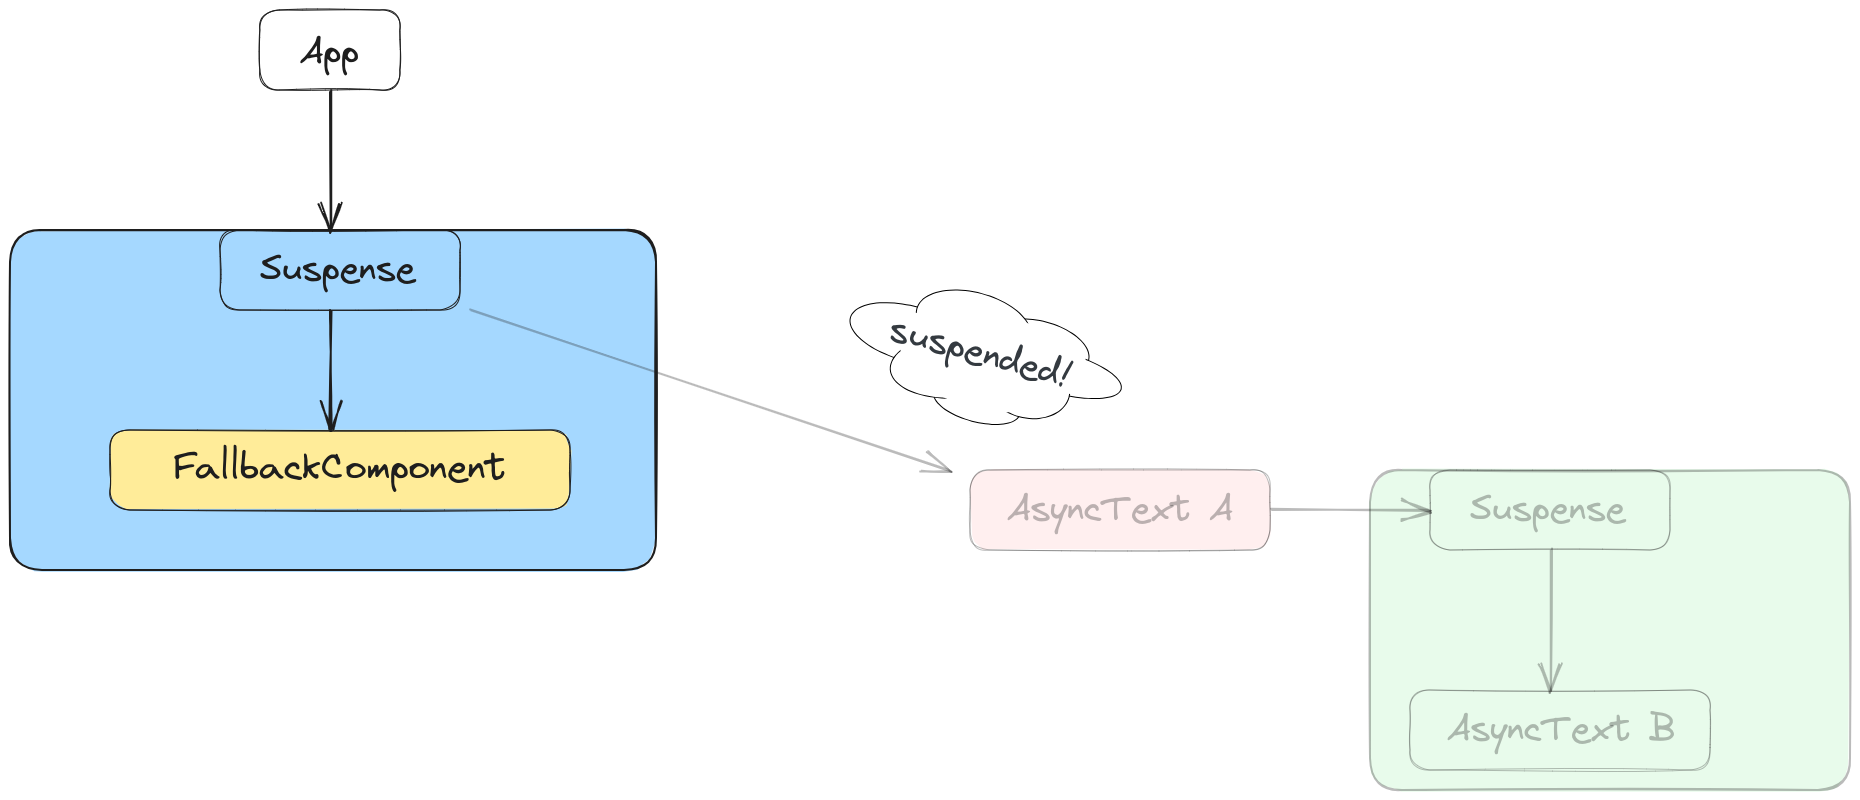
What happens after readText('A') resolves?
The answer is that the rendering process will continue from where it left off: the blue Suspense component. Now, when the AsyncText A component is rendered, its renderText('A') function will no longer throw - it will act normally. So, this means the rendering process can continue, the next rendered component being the green Suspense.
When the AsyncText B component is reached, its readText('B') will throw a promise and, then, it will be caught by its closest Suspense wrapper - in this case, the green one.
Now, we have reached the interesting part - the throttling.
What will be throttled/delayed?
Since a subtree(i.e. the green one) has been suspended as a result of resuming the rendering of the blue Suspense, React will not commit the new changes to the DOM immediately. By new changes, we mean showing the fallback component of the green Suspense. It’s true that React will actually render or, in other words, will determine what the new changes are, but, once again, it will not commit them to the DOM. This is how the not-committed-yet-to-the-DOM Virtual DOM looks like after the green Suspense has caught the promise thrown from the AsyncText B component:
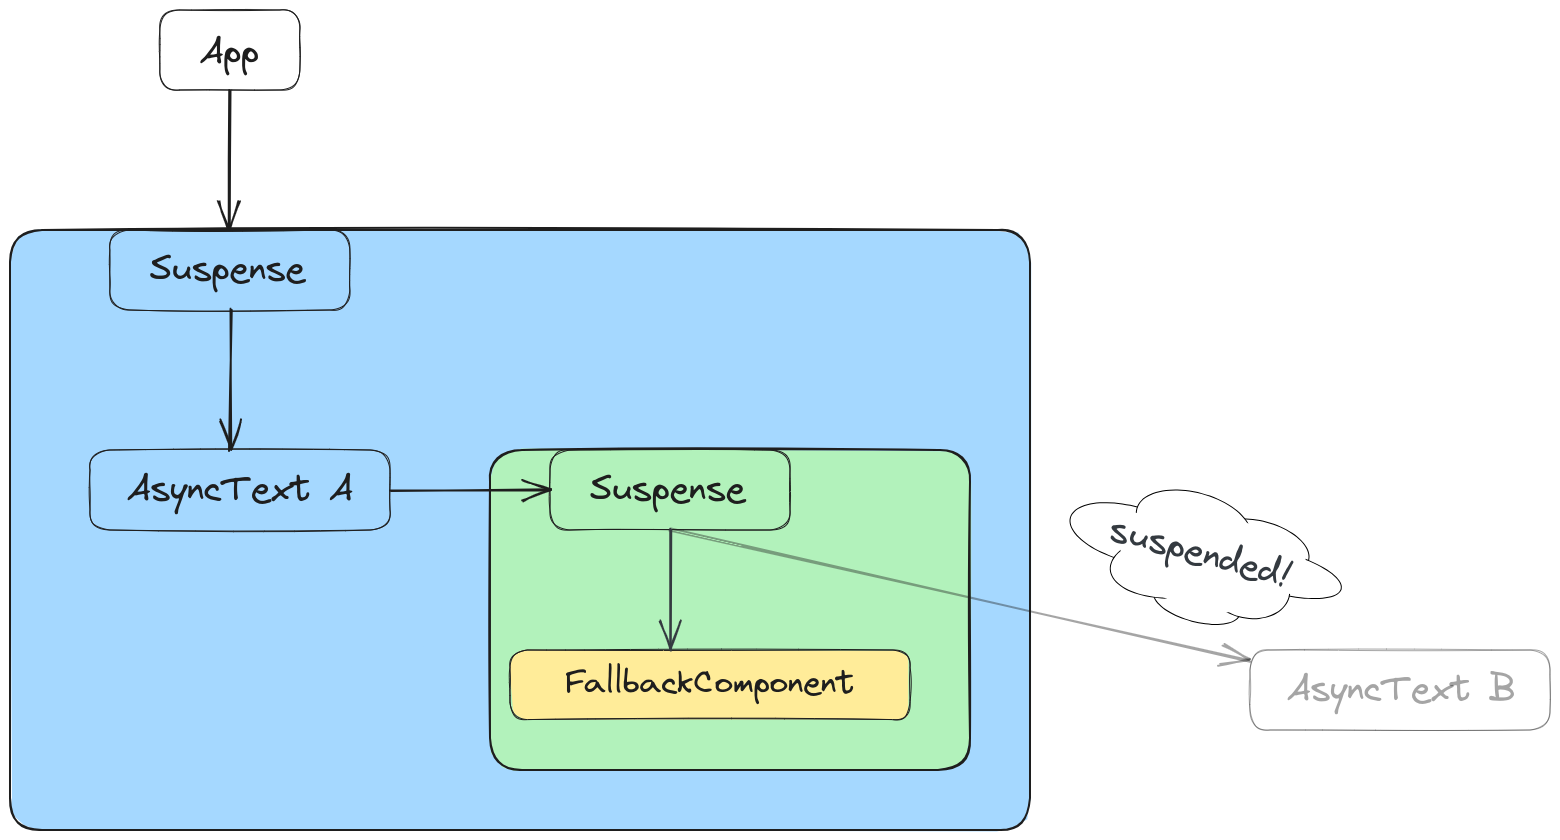
While one would expect the web page to now show the content of AsyncText A and the content of green Suspense’s fallback component, this will not happen immediately.
In fact, this is the what the browser shows:
So, it shows the content that was shown before the AsyncText A’s data has arrived.
For how long?
Definitely not for too much. The exact number depends on the timestamp of the moment a fallback has been shown, plus a constant number of milliseconds.
A pseudo-code of what React does would look like this:
setTimeout(() => {
	commitRoot();
}, msUntilTimeout);
But why does it do that? From my understanding, it does that in order to not perform a redundant commit operation to the actual DOM in case the data arrives very quickly(let’s say, in less than 300ms).
At this point, the blue Suspense component’s fallback is shown and a commit operation to the real DOM has been scheduled at a later point in time. From here, two things can happen:
-
the data in AsyncText B has not been fetched in less than
msUntilTimeout; in this case, these changes will finally be committed to the DOM:
So, the browser will show whatever the AsyncText A component renders and the content of the green
Suspense’s fallback component. -
the data in AsyncText B arrives in time(before the timeout expires) and this is what the browser will show:
Keep in mind that, until either one of the above situations materialize, the browser will show the blue Suspense’s fallback* component. This is what was meant by throttling - delay showing the green Suspense’s fallback too soon, because data might arrive very quickly and committing its corresponding fallback to the DOM becomes redundant, because React will have to commit to the DOM once again immediately after, after the data has arrived.
Conclusion
I hope this article was able to share some insights about how React’s Suspense work.
Lastly, if you’d like to start you own journey exploring React, I’d kindly suggest checking out React: how to debug the source code.
Thanks for reading!
The diagrams have been created with Excalidraw.